Ain’t No Sunshine

Pause for a little serenade from Bill Withers…

Just as the song says, there ain’t no sunshine when she’s gone. “She” in this situation would be my aunt because she is the one responsible for the very large, very literal sunshine painted on her old bedroom wall.

Auntie has gone to stay, and now, so has the sunshine.

IMG_4623

Along with the ginormous sunshine, there’s was teeny-weeny horse – see him? My Aunt is quite the artist.

IMG_4639

I found this paint color in our basement when I was poking around the other day. It was a color my dad had acquired from one of the many blue light special deals he finds. It’s BM’s Cedar Key. It’s a soft tan/gray… and I’m in love with it.
I’m trying not to paint every room in our house straight up gray and I wanted this room to be a little softer/cozier but still go with the rest of the house. (It looks more gray in the picture than it does in real life.)
So, it was pretty much the color I had picked out for this room in my head. What an awesome coincidence to find it in my basement from forever ago…? Once again, thanks dad. You’re the best.

IMG_4690

I’m completely getting ahead of myself with this post btw… the stain isn’t even dry yet. We still need to do touch ups and poly it but I couldn’t wait to slap some pictures up here.

IMG_4698

(almost)Voila!

The Smokeless Monster

In August of 2012, we installed our brand-spankin-new gasification wood boiler. These were exciting times for us because we had finally escaped the evil grip of #2.

This is what our basement looked like when we were slaves to the oil company:
IMG_0508

In November of 2011 – our furnace AND our oil tank both failed inspection and needed to be replaced. The nicest thing they could have done was to die at the same time, and so they did. We all knew it was time for them to go. So, we borrowed an old furnace from camp to help us limp through that winter and in March of 2012, we made the long haul to Lebanon, PA and brought home our little humungo bundle of joy.

Meet The Smokeless Monster:
IMG_1227

She looks a lot better in the basement than she did in the garage.

IMG_2216

IMG_1394

Among our failed heating system, I forgot to mention our failed chimney. It was essential that we build a new chimney before we used our boiler. So, with a HUGE amount of help from Clint, Adam, and Wes – our old chimney was torn down and the new one was installed in one weekend.

IMG_1918

IMG_2188

IMG_2179

IMG_2182

This was the same weekend that JC’s sisters were visiting. So, While the boys put up the chimney, I got some quality time with our niece and nephew and my favorite sis-in-laws. Which basically consisted of lounging around on the grass and chasing the ducks & chickens 🙂

IMG_2017

IMG_2023

IMG_2029

IMG_2013

IMG_2101

And we lived warmly ever after…

Saddle Up

Here’s a little ditty about installing our hardwood floors: JC and I checked out Lowes and Home Depot for the best price/quality of flooring options. We knew that this area has a high traffic volume and we wanted these floors to last forever so we went for the real deal – solid wood.

We chose Bruce – Oak Saddle as our brand/color of choice. The Oak Saddle in the store was ridiculously expensive, I was bummed because it was my favorite but after doing some searching online, we found the same floors for half the price (woot!) we scooped up 19 boxes and crossed our fingers that the color was the same.

One week later, we got a call from Estes and got to skip out early from work so we could get home and unload our pretty, pretty floor boards.
IMG_1708

But, wait… I’m getting ahead of myself. For the sake of remembering those ugly old carpets, let’s take a look back one more time…
IMG_1575
Going…
IMG_1591
Going…
IMG_1594
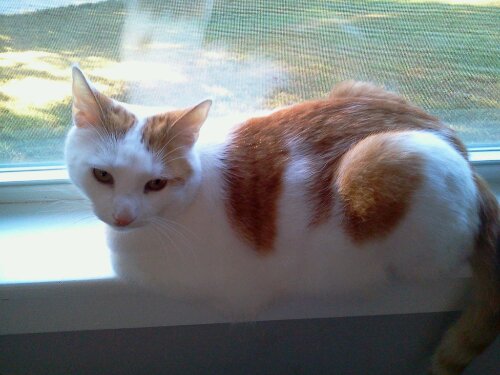
Gone… Oh – Hi, Nuisey and furniture.
IMG_1631
That floor was installed by my grandfather, it’s actually some sort of sticky tile that looks like wood. He had nailed it down in places where it started to peel up. I actually had a few people compliment our “new floors” while we lived like this for a few weeks. Hah! Please… but in their defense, it was dark and we don’t have lights in those rooms. So, I guess it’s understandable.

Here’s a peek at the dining room with a little less linoleum:
IMG_1612

Then came the fun part, eeeek!! This was seriously the best. We opened a couple of boxes at a time and grabbed the prettiest pieces to use. I loved it, all the boards were different and they fit together like puzzle pieces.
IMG_1779

My favorite part was sliding the pieces into place, nailing them together was a fun little bonus. Yes, I’m barefoot. Yes, it was a stupid move. Just don’t tell my mom.
IMG_1787

We had some late night helpers, Adam and Sam. They were real troopers, I think Sam enjoyed it as much as I did. We worked in teams, Sam & Kaylene vs JC & Adam. We dominated that installation like it was our job.
IMG_1792

Day 2… it was hot, we were ready to be done, but the long hours were totally worth it. Who doesn’t like a giant puzzle made of pretty oak? JC, that’s who. He was less than thrilled by day 2 of the project. Here he is before the frustration of tight quarters and weird corners sets in:
IMG_1796
IMG_1801

Inching towards the weird corners… and JC’s mini anxiety attack.
IMG_1814

Day 3 we finished up all the edges near the wall where we couldn’t use the nail gun.
IMG_1818

This has been the sweetest, most anticipated, hardest, most fun to achieve project to date. We are more than satisfied with the results:
IMG_1846

Makes you want to slide down there in your socks, doesn’t it?
IMG_1855

Magenta Madness

It was high time for that pink rug to hit the road. It was extremely outdated and way past its prime, if it ever had a prime…? I know one thing, without the rose wallpaper, the carpet just looked lonely and out-of-place.

We were pretty pumped to tear it up so we set the date: Big Trash Day. This would be our first experience with big trash day in our town and we had plenty to contribute, namely one pink carpet:
IMG_1602

What we discovered under the carpet and foam padding was an unfinished wood floor in perfected condition. It was preserved by the carpet all these years, just waiting to be unveiled, sanded, and stained. And that’s exactly what we did.

First, we sanded it down and removed all the staples that held the foam into place.

IMG_1659

Then the both of us stained it together. This was my first time staining, I was surprised at how “a little goes a long way”. The total cost of this project was $7.00.

Behold:

IMG_1666

IMG_1664

Not bad considering this is where we were just months before:
IMG_0304

It’s fun making our house pretty. I’ll be back with pictures of our newly installed wood floors. Mmmm.

-Kaylene

What’s New With The Miller’s

Let’s catch you up to speed, shall we?
A lot has happened since… May. Like, the snow has melted, summer has completely gone by and oh would you look at that! It’s September. We just returned from an AWESOME weekend with our family in Pennsylvania. JC’s parents just bought a house in the middle of the woods (literally), and it’s absolutely beautiful. We couldn’t have had a better visit, if only it were longer. The group of us had a blast and together we made: friends, siblings, parents, grandparents, grandkids, nieces, nephews, uncles, aunties, and a tee tee… I think I covered everyone. Oh, and Smokey the cat who produced a steady supply of dead mice.
I wish I had a group picture of us on the deck sipping sodas, reminiscing and reconnecting. There I go, getting all sentimental on you.
Although I don’t have any group pictures, I do have a few pictures of the cuties we hung out with this weekend:
image
This is big sister Carly! JC’s sister, Bernadette and her husband Clint have two adorable kiddo’s. Here’s Carly’s little brother, Rogue.
image
We had such a blast with them!

So, now what’s new with out house? Like I said before, a lot has happened since my last post about painting the kitchen. Here’s a few things that we’ve accomplished:

  • We have installed new or refinished floors in the living room, dining room, and lounge area.
  • We rebuilt our chicken coop.
  • We tore down our old chimney and installed a new one all by ourselves (and by that I mean JC, Clint, Wes, and Adam did all the work and an AMAZING job.)
  • We moved our boiler out of the garage and installed it in the basement.
  • JC cut, split, and stacked ALL of our firewood like a madman.
  • Ect, ect, ect…

I’ll review these items in detail with pictures when I can catch my breath. It’s been a crazy busy summer. Longer hours at work + beautiful weather = no desire to be on the computer, thus my lack of presence on the blog. I’ll be back soon this time, promise.

I’m Dreaming of a White Kitchen

While periwinkle blue is a pretty color on flowers, I couldn’t stand it in my kitchen any longer. My grammie’s color scheme was periwinkle blue and maroon paired with wallpaper of similar colors and a border of colonial style homes. It gave her kitchen the boost it needed 10 years ago.
Now it’s time for this old hole of a kitchen to get another boost to hold it me over  before total renovation; new upper/lower cabinets, floors, countertops, lighting, built-ins for new appliances… you get the point. I can’t wait to start demo’ing but in the mean time we took this:
IMG_0324

and turned it into this:
IMG_1681

I’m not going to share all the nitty gritty photo’s because, I’ll be honest, it’s no where near perfection… Like, I didn’t even paint the inside of the doors… shhh.
This project was a quick fix to keep my sanity – purpose served.
IMG_1688

Covering A Multitude of Sins

We’ve been debating for a while on what we should do about our dining room walls. Removing the wallpaper proved to be very destructive. The glue from the wallpaper clung to the old drywall and ripped it down to the chalky stuff in some places. By the time we finished tearing it all off, the walls were left gouged and bumpy. What a mess.

IMG_0622

We contemplated multiple solutions… from wainescoting to completely replacing the drywall. After a lot of research and mild arguments, we settled on paintable wallpaper. It was the fastest most affordable fix and didn’t require any demo. We also don’t mind the existing bead board so we figured we should stick with what works for us.

On my search for the right textured wallpaper, I came across a comment from a happy customer in the review section “this stuff covers a multitude of sins”. I burst out a happy little giggle and ordered 2 rolls – covering a multitude of sins is exactly what our walls needed.

As soon as it came, I had it slapped up on the walls in less than an hour.
IMG_1348

Much better! I didn’t even mind the white so it stayed like that for a few weeks. Anything is better than ripped drywall and aqua lead based paint.
IMG_1347

Unwanted Half Hole

Remember back in February when JC patched up the hole in our living room wall? And how awesome it came out? (See this post to refresh your memory.)

While the living room side of the wall was looking smooth and blended, the bathroom side of the wall looked like this:
IMG_0549
The view from the pot wasn’t a pretty one. A bathroom should be a place of peace and serenity, not a construction zone.
I’ll admit though, I made the best of the situation. Sometimes I would hang my bathrobe or towels on the little nails that stuck out of the wall.

As resourceful as that may be, it was time for the nails and the hole to leave… or hide. Whatever. But since this project was all JC’s (my drywall skills end at tapping and puttying) we just let it sit until he felt the motivation to fix it – which was Monday night after work.

We’re one step closer to peace and serenity in the bathroom:
IMG_1712

Next steps are:
Repaint
Replace the dingy light switch and outlet’s with white ones
Replace the back splash
Swap out the sink
Remove the medicine cabinet and replace it with a mirror